Achieve a Straighter Smile with Clear Aligners at Home
February 21, 2026
Achieve a Straighter Smile with Clear Aligners at Home
Every parent faces that moment when their child feels self-conscious about their smile and braces seem overwhelming. Finding an option that fits busy routines and avoids constant trips across Langley is a top concern, especially as pre-teens juggle school and activities. Affordable at-home clear aligners offer a nearly invisible way to correct mild to moderate dental issues while minimizing disruptions. Consistent wear for 20 to 22 hours daily is vital for results, so learning about candidacy, preparation, and monitoring ensures you choose the right path for your child’s dental confidence.
Table of Contents
- Step 1: Assess Your Child’s Dental Needs for Clear Aligners
- Step 2: Order and Prepare Your At-Home Clear Aligner Kit
- Step 3: Follow Instructions to Fit and Wear Aligners Properly
- Step 4: Monitor Progress and Verify Tooth Alignment Success
Quick Summary
| Key Point | Explanation |
|---|---|
| 1. Evaluate Dental Needs First | Assess crowding, spacing, bite issues, and jaw development to determine suitability for clear aligners. |
| 2. Involve the Child in Consultation | Bringing your child to the orthodontist helps them understand treatment and fosters commitment to wearing aligners. |
| 3. Establish a Daily Routine for Wear | Create a schedule for wearing and removing aligners, ensuring they are worn 20 to 22 hours daily for effective treatment. |
| 4. Monitor Progress Regularly | Attend check-ups every 6 to 8 weeks to assess tooth movement and make necessary adjustments in alignment treatment. |
| 5. Set Up a Care and Storage System | Designate a storage area for aligners and prepare dental hygiene tools to promote proper care and maintenance during treatment. |
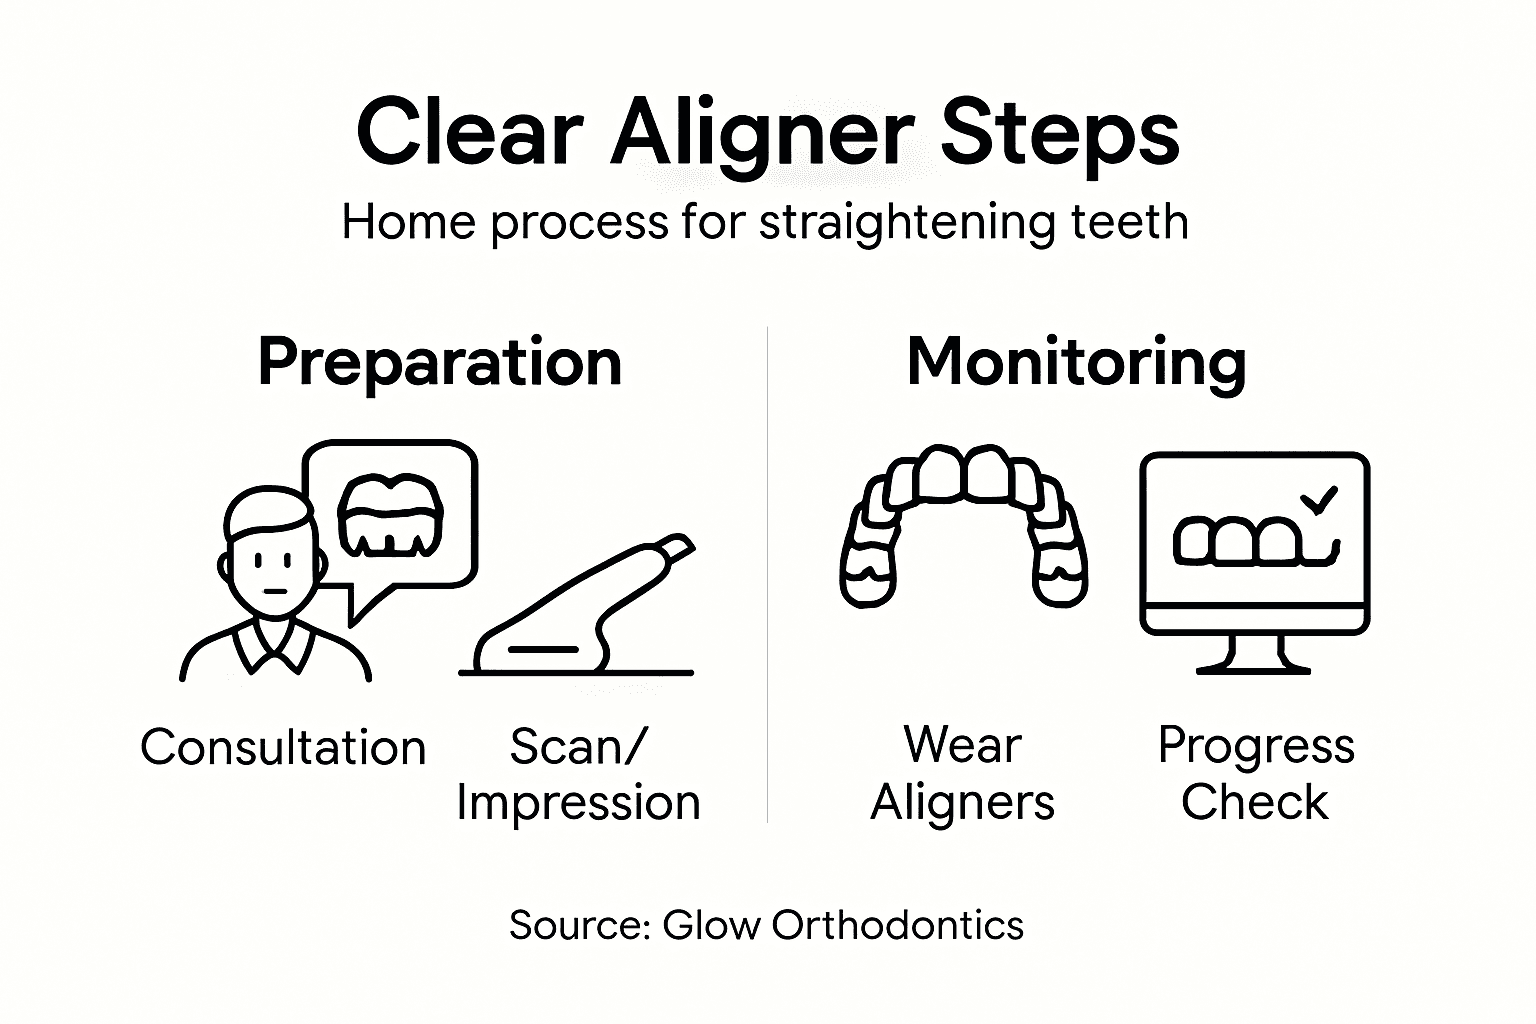
Step 1: Assess Your Child’s Dental Needs for Clear Aligners
Before your child starts treatment, you need to understand what makes them a good candidate for clear aligners. This step involves evaluating their current dental situation and determining whether clear aligners will address their specific concerns.
Start by observing your child’s smile closely. Look for these common alignment issues:
- Crowded teeth or spacing gaps
- Overbite, underbite, or crossbite
- Rotated or twisted teeth
- Misaligned jaw position
Next, schedule a consultation with an orthodontist. During this visit, they’ll examine your child’s teeth, take X-rays, and assess their jaw development. This professional evaluation is crucial because clear aligners work differently for growing patients than traditional braces, and not every case is suited for this approach.
Your orthodontist will consider several factors when determining if clear aligners are right for your child. Their age and how much more their jaw will grow matters significantly. Some cases benefit more from traditional methods, while others respond beautifully to aligners.
Ask your orthodontist these specific questions:
- Will my child’s jaw continue growing significantly?
- Are there any bite issues that require different treatment?
- How long will treatment likely take?
- Can clear aligners address all the concerns we’ve identified?
Discuss your lifestyle preferences too. Clear aligners require discipline, as your child needs to wear them 20 to 22 hours daily and remove them for eating and brushing. If your pre-teen is athletic or plays wind instruments, understanding how treatment fits into their routine matters.
Once you have a clear picture of your child’s needs and the orthodontist’s recommendations, you can confidently move forward with planning.
Here’s a quick comparison of clear aligners versus traditional braces for children:
| Aspect | Clear Aligners | Traditional Braces |
|---|---|---|
| Visibility | Nearly invisible | Highly visible |
| Food Restrictions | Removable, fewer limits | Avoid sticky/hard foods |
| Daily Maintenance | Remove to brush teeth | Brush around brackets |
| Comfort | Smooth, less irritation | May cause mouth sores |
| Suitability | Mild-moderate cases | All alignment issues |
| Office Visits | 6-8 weeks or remote | Every 4-8 weeks |
Your child’s willingness to follow treatment instructions is just as important as their dental needs when choosing clear aligners.
Pro tip: Bring your child to the consultation so they understand what to expect and feel involved in the decision. Kids who participate in treatment planning are more likely to stay committed to wearing their aligners consistently throughout the process.
Step 2: Order and Prepare Your At-Home Clear Aligner Kit
Once your orthodontist has cleared your child for clear aligner treatment, the ordering and preparation phase begins. This step involves getting accurate dental impressions, placing your order, and preparing your home for treatment success.
Your first task is to get a dental scan or impression. Your orthodontist will use 3D imaging technology to capture digital scans of your child’s teeth. This is painless and takes just minutes. The digital scan creates a precise map of their current tooth positions, which manufacturers use to design custom aligners.
If your orthodontist hasn’t already addressed it, make sure any prior dental issues are treated before ordering. This means cavities should be filled and your child’s teeth should be clean and healthy. Starting with a healthy foundation sets up treatment for success.
Once you place your order, here’s what to expect:
- Your orthodontist submits the scan and treatment plan to the manufacturer
- A personalized treatment plan is created showing the expected tooth movements
- Your aligner kit arrives within 1 to 2 weeks
- You schedule a follow-up appointment to receive the first set of aligners
Before the aligners arrive, prepare your home for the treatment journey. Set up a designated storage area for the aligners, ideally a small case or container away from heat and pets. Stock up on a soft toothbrush, fluoride toothpaste, and floss so your child can clean their teeth thoroughly after meals.
Below is a summary of recommended home preparation steps before aligner treatment begins:
| Preparation Task | Why It Matters | Suggested Tools or Tips |
|---|---|---|
| Designate aligner storage | Prevents loss and damage | Use labeled case, keep in bathroom |
| Stock oral hygiene supplies | Promotes healthy teeth and gums | Soft toothbrush, fluoride toothpaste, floss |
| Create a daily checklist | Builds treatment routine and habits | Post near bathroom mirror |
| Plan meal times and snacks | Minimizes aligner removals | Schedule meals, pack water bottle |
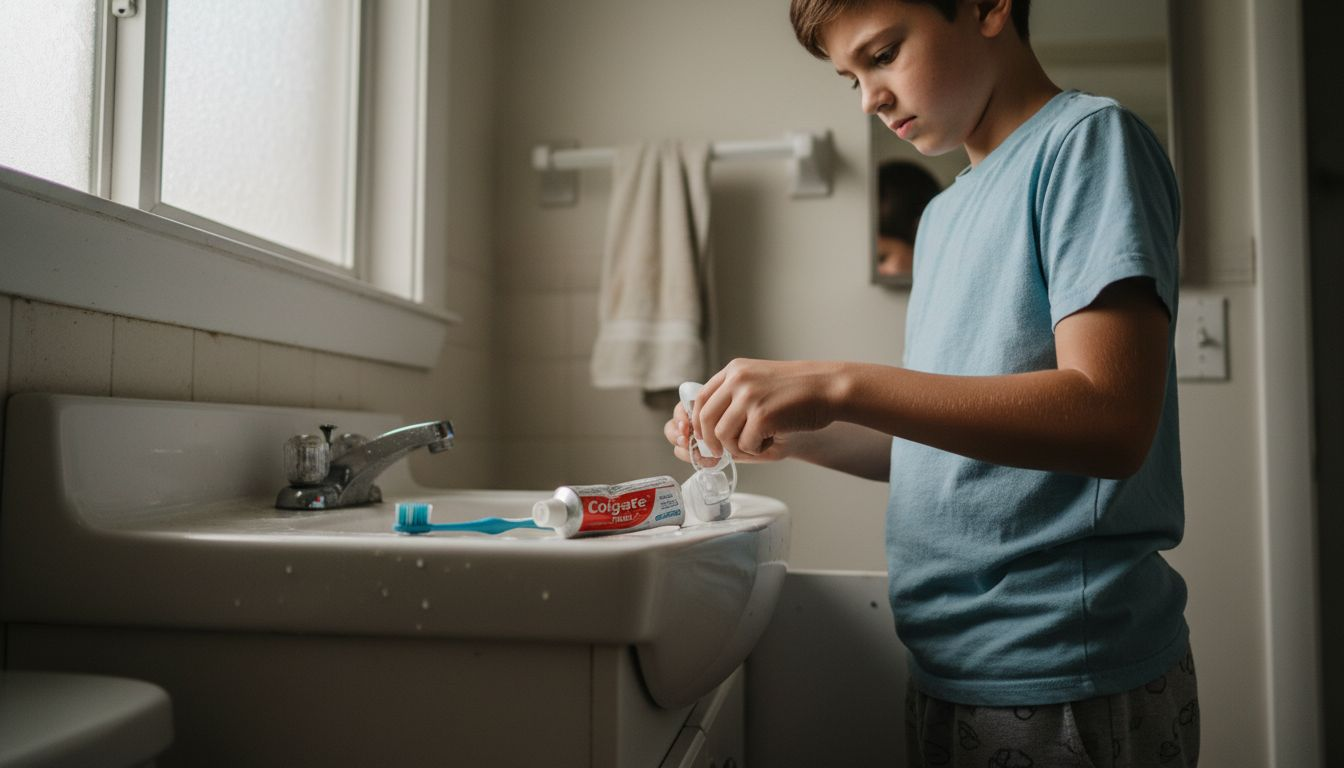
Understanding how to wear and care for aligners is essential before they arrive. Aligners must be worn most of the day and removed only for eating and cleaning. This commitment requires planning, especially for a pre-teen adjusting to a new routine.
Starting treatment with realistic expectations and proper preparation makes the adjustment much smoother for your child.
Pro tip: Create a simple checklist for your child listing when to wear aligners, when to remove them for meals, and their nightly cleaning routine. Posting this on the bathroom mirror makes the expectations clear and helps them stay accountable without constant reminders from you.
Step 3: Follow Instructions to Fit and Wear Aligners Properly
When your child’s first set of aligners arrives, proper fitting and consistent wear are essential for success. This step teaches you how to help your child wear aligners correctly and maintain the routine that drives results.
Start by having your child try on the first set of aligners. They should fit snugly but not painfully around each tooth. Your orthodontist will show your child how to insert and remove them properly. The first few days may feel uncomfortable as teeth begin their gentle movement, but this sensation is normal and temporary.
Clear aligner therapy requires wearing aligners 20 to 22 hours daily. This means your child removes them only for eating, drinking anything other than water, and brushing their teeth. The time commitment is significant, so helping your child build this habit early prevents motivation issues later.
Here’s the typical aligner progression:
- Wear each aligner set for 7 to 14 days as directed
- Progress to the next aligner when your orthodontist confirms
- Continue the sequence until treatment is complete
- Attend regular check-ups every 6 to 8 weeks
Teach your child the proper insertion and removal technique. They should gently apply even pressure across the aligner with their thumbs to insert it fully. To remove, they should use their fingers at the back molars to lift slightly, then work around until free. This careful approach prevents damage.
Create a daily routine around aligner wear. Aligners should be worn consistently for about 20 hours daily to achieve desired results. Set specific times for removal, like during breakfast and dinner, so your child knows exactly when the aligners come out.
Remind your child to clean their teeth before reinserting aligners. Food particles trapped between teeth and aligners can cause cavities. A quick rinse with water works when brushing isn’t possible.
Consistency during the first two weeks sets the tone for your child’s entire treatment success.
Pro tip: Use a phone alarm or calendar app to remind your child when it’s time to put aligners back in after meals. Pre-teens respond well to visual reminders rather than verbal ones, and this takes the responsibility off your shoulders.
Step 4: Monitor Progress and Verify Tooth Alignment Success
Tracking your child’s treatment progress ensures that teeth are moving as planned and that you catch any issues early. This step helps you stay informed about what to expect and how to recognize successful alignment.
Your orthodontist will schedule regular check-up appointments throughout treatment. These visits typically occur every 6 to 8 weeks. During each appointment, your orthodontist assesses whether teeth are moving according to the treatment plan and whether your child should progress to the next aligner set.
At these visits, your orthodontist may take periodic scans or X-rays to measure tooth movement. These images show precisely how your child’s teeth are shifting and help verify that alignment matches the original plan. If any adjustments are needed, your orthodontist can modify the treatment strategy.
Some practices now offer remote monitoring technology for between-visit progress tracking. Remote monitoring tools allow orthodontists to track treatment progress30830-1/fulltext) and verify that teeth are moving as expected without requiring constant office visits. This option, when available, reduces appointment frequency while maintaining accountability.
Watch for these signs of successful progress:
- Visible gap closure between teeth
- Straighter tooth alignment compared to previous months
- Reduced crowding or spacing issues
- Improved bite alignment
- Your child reporting less discomfort with each new aligner
Regular orthodontic visits monitor treatment progress and verify alignment success. Your orthodontist may recommend refinement aligners if final results need adjustment. This is completely normal and often included in your treatment plan from the start.
Keep detailed notes of any concerns. If your child experiences persistent pain, aligner breakage, or you notice teeth not moving as expected, report this immediately at your next appointment.
Staying engaged with monitoring visits keeps treatment on track and catches problems before they affect your child’s results.
Pro tip: Take monthly photos of your child’s smile from the same angle to create a visual record of progress. Comparing photos side by side motivates kids and helps you recognize improvements that daily observation might miss.
Take the First Step Toward Your Child’s Confident Smile with Clear Aligners
Understanding how clear aligners work and preparing for treatment at home can feel overwhelming, especially when considering your child’s unique dental needs and lifestyle. Whether you are navigating questions about their jaw growth, daily aligner wear, or fitting aligners properly, Glow Orthodontics is here to support your family with expert guidance and personalized care. Our warm and professional team in Langley helps make the journey to a straighter smile smooth and encouraging for both you and your child.

Explore convenient and expert orthodontic options by scheduling a consultation with Glow Orthodontics today. Discover how our orthodontic specialists tailor clear aligner treatments to your child’s specific needs while ensuring comfort and success. Don’t wait to unlock the benefits of a confident, healthy smile; visit Glow Orthodontics and learn more about our complete orthodontic services. Take control of your child’s smile journey now by booking your appointment online and joining a community dedicated to patient-focused care and lasting results.
Frequently Asked Questions
What dental issues can clear aligners address for my child?
Clear aligners can effectively treat various dental concerns, including crowded teeth, gaps between teeth, overbite, underbite, and misaligned jaw positions. To determine suitability, have your child evaluated by an orthodontist.
How long does clear aligner treatment typically take?
Treatment duration for clear aligners varies based on the complexity of the case, but it usually lasts between 6 to 18 months. Talk with your orthodontist about your child’s specific situation to get an estimated timeline.
How can I help my child stay committed to wearing their aligners?
Encourage your child to wear their aligners for 20 to 22 hours daily and establish a consistent routine for removing them during meals and cleaning. Use visual reminders, such as a checklist or phone alarms, to help them stay on track.
What should I do if my child’s aligners do not fit properly?
If your child’s aligners feel too tight or uncomfortable, contact your orthodontist immediately. They may need to make adjustments or review your child’s progress to ensure the treatment is on track.
How can I prepare my home for my child’s clear aligner treatment?
Designate a storage area for the aligners to prevent loss, and stock up on oral hygiene supplies like a soft toothbrush and fluoride toothpaste. Create a daily checklist to help your child establish a consistent cleaning and wearing routine.
How often will we need to visit the orthodontist during treatment?
Typically, orthodontic visits occur every 6 to 8 weeks to monitor progress and determine if your child is ready to move to the next set of aligners. Ensure you keep these appointments to stay on track with your child’s treatment plan.