How to Clean Clear Aligners Naturally for a Brighter Smile
November 19, 2025
How to Clean Clear Aligners Naturally for a Brighter Smile
Clear aligners can lose their sparkle fast if you skip proper cleaning. In fact, studies show that over 60 percent of aligner users see discoloration or buildup within the first month without regular care. Most people want their aligners to stay invisible and odor free, but daily routines make that tricky. With a few simple tools and some smart steps, you can keep your aligners crystal clear and your smile on track for amazing results.
Table of Contents
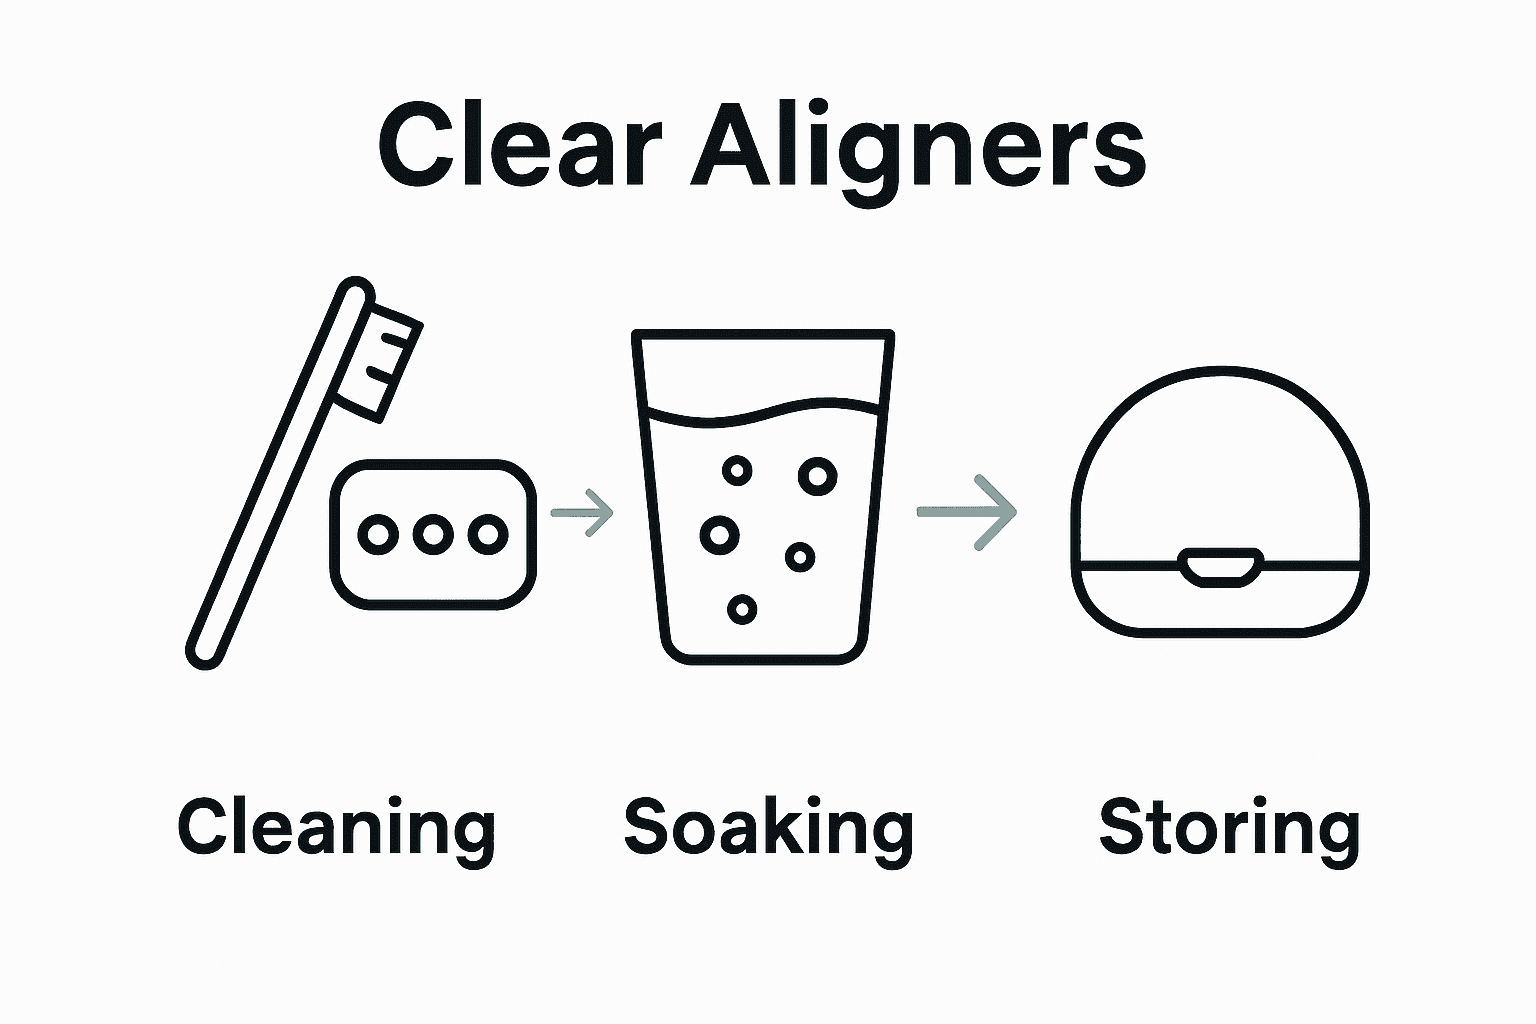
- Step 1: Gather Essential Cleaning Tools
- Step 2: Rinse Aligners Under Lukewarm Water
- Step 3: Brush Aligners With Gentle Cleanser
- Step 4: Soak Aligners To Remove Stubborn Debris
- Step 5: Inspect Aligners For Clarity And Freshness
- Step 6: Store Aligners Properly Between Uses
Quick Summary
| Key Point | Explanation |
|---|---|
| 1. Use a soft bristled toothbrush | Always clean aligners with a dedicated soft bristled toothbrush to avoid scratching and bacteria buildup. |
| 2. Rinse with lukewarm water immediately | Rinse aligners under lukewarm water right after removal to remove saliva and prevent bacterial growth. |
| 3. Brush gently with mild soap | Clean aligners using mild antibacterial soap; avoid regular toothpaste to prevent scratches and cloudiness. |
| 4. Soak in denture cleaner daily | Soak aligners in a denture cleaning solution for 15 minutes to remove stubborn debris while maintaining clarity. |
| 5. Store in a clean protective case | Always use a designated protective case to prevent damage, contamination, and ensure cleanliness between uses. |
Step 1: Gather Essential Cleaning Tools
Keeping your clear aligners sparkling clean starts with assembling the right cleaning arsenal. You will want to collect a few simple tools that will help you maintain your aligners effectively and keep them looking crystal clear.
According to schwimmerdental.com, the most important tool is a soft bristled toothbrush paired with a mild non abrasive soap. Avoid using regular toothpaste, which can scratch your aligners and create tiny spaces where bacteria might hide. Instead, opt for these key cleaning companions:
- A soft bristled toothbrush (designated only for aligner cleaning)
- Mild antibacterial soap
- Lukewarm water
- Clean hand towel
Pro tip: Choose a separate toothbrush exclusively for your aligners to prevent cross contamination and ensure thorough cleaning. This small step can make a significant difference in maintaining your aligner hygiene and preventing potential bacterial buildup.
By gathering these simple tools before you begin, you will set yourself up for a smooth and effective aligner cleaning routine that keeps your orthodontic investment looking pristine and feeling fresh.
Step 2: Rinse Aligners Under Lukewarm Water
Now that you have your cleaning tools ready, the first step in maintaining pristine clear aligners is a thorough yet gentle rinse. This simple process helps remove saliva, bacteria, and prevent potential buildup that could compromise your aligner’s clarity and hygiene.
According to finesmilesdental.com, it is crucial to rinse your aligners under lukewarm water immediately after removing them. As bonniedoondentist.com emphasizes, this step is essential for preventing bacterial accumulation and maintaining overall aligner cleanliness.
When rinsing, follow these key guidelines:
- Hold your aligners gently under a steady stream of lukewarm water
- Rotate the aligners to ensure all surfaces get rinsed
- Avoid using hot water, which can permanently warp the plastic
- Use gentle hand movements to prevent bending or damaging the aligners
Warning: Hot water is a definite no go. Temperatures that are too high can distort your aligners’ shape, potentially ruining their precise fit and compromising your orthodontic treatment.
By taking just a minute to rinse your aligners carefully, you will help maintain their transparency, prevent odor, and ensure they remain in top condition for your next wear.
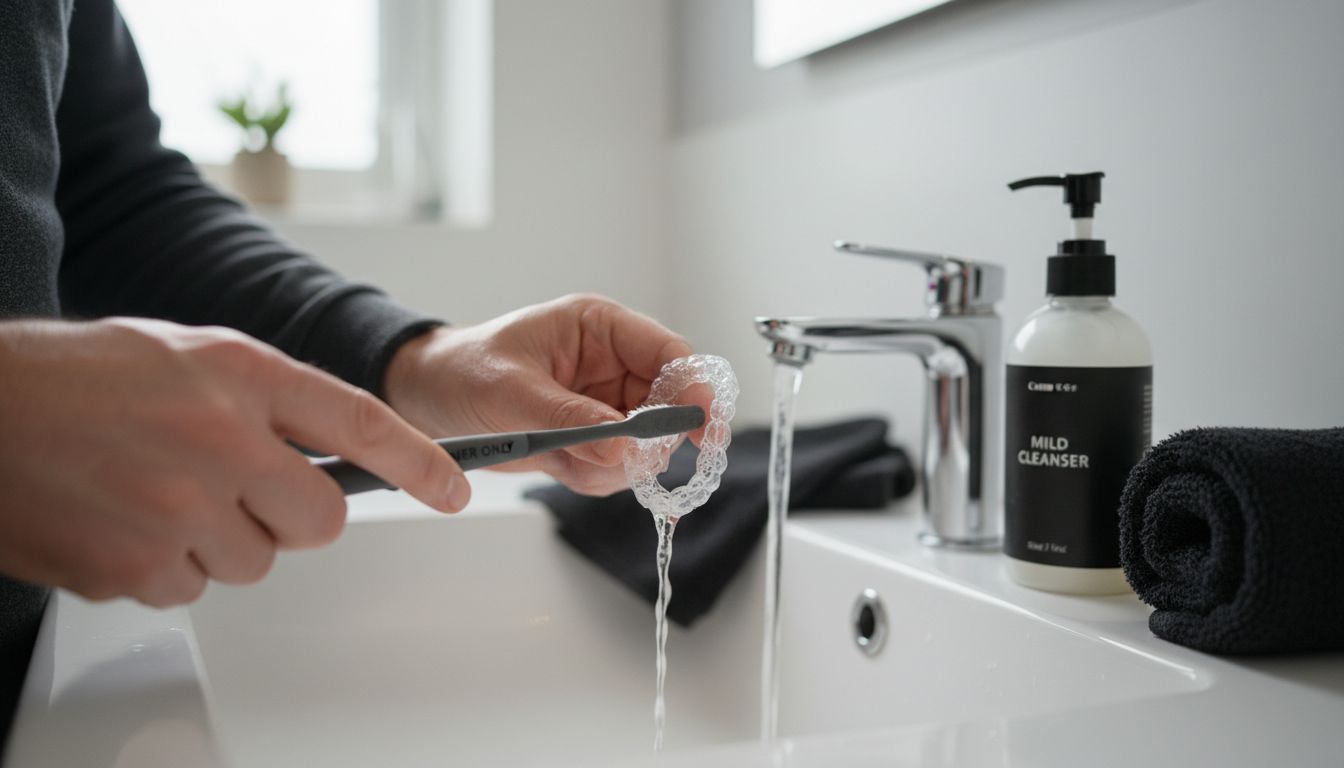
Step 3: Brush Aligners with Gentle Cleanser
After rinsing your aligners, the next crucial step is to gently brush them clean. This process helps remove any lingering plaque or debris that could compromise your aligner’s clarity and hygiene.
According to schwimmerdental.com, you should use a soft bristled toothbrush and mild non abrasive soap to carefully clean your aligners. The key is to be gentle yet thorough.
Here are some specific brushing techniques to keep your aligners in pristine condition:
- Use your designated soft bristled toothbrush
- Apply a small amount of mild antibacterial soap
- Brush gently in circular motions on all surfaces
- Rinse thoroughly with lukewarm water after brushing
Warning: Never use regular toothpaste when cleaning your aligners. The abrasive ingredients can create microscopic scratches that trap bacteria and make your aligners look cloudy.
Take your time with this step. A careful 30 second cleaning can make a significant difference in maintaining your aligners’ transparency and preventing potential bacterial growth. Your future self will thank you for the extra care you put into maintaining your orthodontic investment.
Step 4: Soak Aligners to Remove Stubborn Debris
After brushing your aligners, sometimes you need an extra boost of cleaning power to tackle those hard to remove particles. Soaking provides a deep clean that goes beyond regular brushing and helps maintain your aligners’ crystal clear appearance.
According to schwimmerdental.com, soaking your aligners in a denture cleaning solution for approximately 15 minutes daily can help remove stubborn debris and keep your aligners feeling fresh. However they stress that soaking should complement your regular brushing routine not replace it.
Here are some key guidelines for effective aligner soaking:
- Choose a specialized denture cleaning solution
- Soak for no more than 15 minutes
- Use lukewarm water to prevent plastic distortion
- Rinse thoroughly after soaking
Warning: Do not soak your aligners in colored or scented solutions that might stain or leave residue. Stick to clear cleaning solutions designed specifically for dental appliances.
By incorporating this soaking step into your routine, you will ensure your aligners remain clean, clear, and free from buildup that could compromise their appearance or your oral hygiene. This extra care takes just minutes but can make a significant difference in your orthodontic treatment experience.
Step 5: Inspect Aligners for Clarity and Freshness
Your aligner cleaning routine is not complete until you perform a thorough visual inspection. This final step ensures that your hard work pays off and your aligners remain in top condition throughout your orthodontic treatment.
According to schwimmerdental.com, it is critical to regularly check your aligners for any signs of cloudiness or discoloration. Persistent stains or a murky appearance might signal that you need to adjust your cleaning technique or consult with your orthodontist.
When inspecting your aligners, look for these key indicators of cleanliness:
- Crystal clear transparency
- No visible white film or residue
- Absence of calcium buildup or hard water marks
- Smooth surface without scratches
- Fresh and odorless appearance
Pro tip: Use natural daylight or bright overhead lighting to examine your aligners. These lighting conditions will help you spot even the smallest imperfections that might be missed under dimmer settings.
If you notice any persistent cloudiness or staining after following your cleaning routine, do not hesitate to reach out to your orthodontist. A quick professional consultation can help you maintain the integrity of your aligners and keep your smile transformation on track.
Step 6: Store Aligners Properly Between Uses
Protecting your clear aligners when they are not in use is just as important as cleaning them. Proper storage prevents damage, loss, and potential bacterial contamination that could compromise your orthodontic investment.
According to finesmilesdental.com, you should always store your aligners in their designated protective case when not wearing them. Bonniedoondentist.com reinforces this advice, emphasizing that the storage case must be clean and dry to prevent bacterial exposure.
Follow these essential storage guidelines:
- Always use the provided hard protective case
- Keep the case clean and dry
- Store the case in a cool and stable environment
- Avoid leaving aligners exposed on counters or surfaces
- Keep the case away from direct sunlight or heat sources
Warning: Never wrap your aligners in napkins or tissues. These can be easily thrown away accidentally or become breeding grounds for bacteria.
By taking a few extra seconds to carefully store your aligners each time you remove them, you will protect your orthodontic treatment investment and ensure your aligners remain in perfect condition. A little care goes a long way in maintaining your path to a beautiful smile.
Maintain Your Clear Aligners and Smile with Confidence
Keeping your clear aligners clean and crystal clear is essential to enjoying a bright, healthy smile throughout your orthodontic journey. This article highlights the importance of gentle cleaning, proper soaking, and correct storage to prevent cloudiness, bacteria buildup, and damage that could affect your treatment results. We understand how frustrating it can be to struggle with keeping your aligners fresh and spotless while juggling daily life.

At Glow Orthodontics, we specialize in personalized Invisalign treatments and provide expert guidance to help you maintain your aligners effectively and comfortably. Our caring team is here to support you every step of the way—from your initial consultation to achieving the glowing smile you deserve. Visit us at Glow Orthodontics for trusted advice, patient testimonials, and easy appointment scheduling. Take control of your smile today by booking your visit with us and discover how simple daily care can keep your aligners—and confidence—shine bright.
Learn more about our tailored treatment options on our homepage. Ready for your smile transformation? Contact us now and experience the warm, professional care that Langley trusts.
Frequently Asked Questions
How can I clean clear aligners naturally?
To clean clear aligners naturally, use a soft bristled toothbrush with mild antibacterial soap and lukewarm water. Gently brush all surfaces in circular motions and rinse thoroughly to remove any debris.
What should I soak my aligners in for effective cleaning?
Soak your aligners in a clear denture cleaning solution for about 15 minutes daily. This extra step will help remove stubborn debris and keep your aligners fresh and clear.
Can I use regular toothpaste to clean my clear aligners?
No, you should never use regular toothpaste on your clear aligners as it can scratch the plastic and trap bacteria. Instead, stick to mild non-abrasive soap for safe, effective cleaning.
How often should I clean my clear aligners for optimal hygiene?
Clean your clear aligners at least twice daily—once in the morning and once before bed. This regular routine will help maintain their clarity and prevent any bacterial buildup.
What signs indicate my aligners need more cleaning?
Inspect your aligners for cloudiness, white film, or any odors; these signs suggest they need more cleaning. If the problem persists, consider adjusting your cleaning method or consulting with your orthodontist.
How should I store my clear aligners when not in use?
Always store your clear aligners in the provided protective case to prevent damage and bacterial contamination. Make sure the case is clean and dry, keeping it in a stable environment away from direct sunlight or heat.