Orthodontic Wax for Braces: What It Is and How to Use It
July 21, 2026
Orthodontic Wax for Braces: What It Is and How to Use It
TL;DR:
- Orthodontic wax creates a protective barrier between braces and soft tissues to prevent irritation. Proper application involves thorough drying of brackets and regular replacement to maintain effectiveness. It is safe and made from natural waxes, but cannot replace professional repairs for broken brackets or ongoing pain.
What is orthodontic wax for braces?
Orthodontic wax is a non-toxic, medical-grade product made from natural waxes like beeswax, carnauba wax, or paraffin. Its job is simple: create a smooth barrier between the metal parts of your braces and the soft tissue inside your mouth.
Brackets and wires are hard and angular. Your cheeks, gums, and lips are not. When braces rub repeatedly against those soft areas, you get sores, cuts, and irritation, especially in the first few weeks after getting braces or after an adjustment. Orthodontic wax covers those sharp edges so your mouth can heal.
Here is what it does at a glance:
- Acts as a cushion between brackets or wires and your cheeks, gums, and lips
- Prevents new sores from forming while existing ones heal
- Provides temporary relief when a wire protrudes or a bracket feels sharp
- Eases the adjustment period after each orthodontic appointment
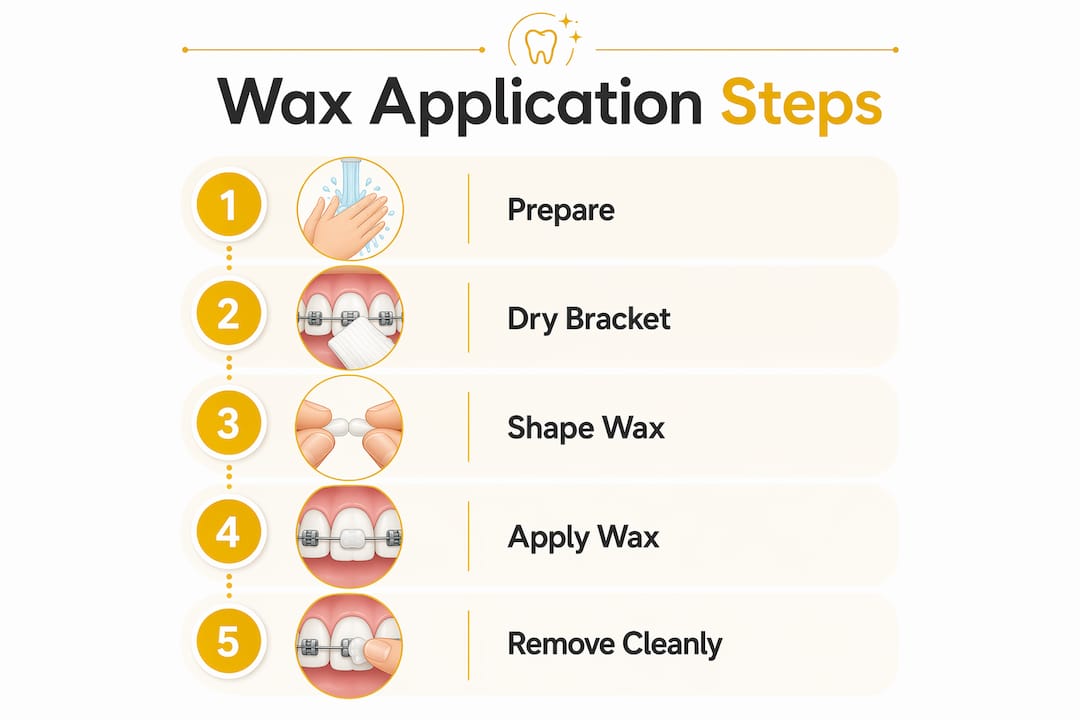
How to apply orthodontic wax step by step
Getting the application right makes a real difference. Wax that slips off within minutes usually means one of the prep steps was skipped.
- Wash your hands. Clean hands prevent bacteria from getting trapped under the wax near your gums.
- Brush your teeth. Good hygiene before application reduces the risk of trapping bacteria against your gum tissue.
- Dry the bracket or wire. Use a cotton swab or a piece of gauze to dry the area. This step matters more than most people realize.
- Pinch off a pea-sized piece of wax. Roll it between your fingers for several seconds until it softens and becomes pliable.
- Press it firmly over the problem area. Shape it so it covers the sharp edge completely. Use your tongue to smooth it into place if needed.
- Replace wax every two days or sooner if it gets dirty or starts to loosen.
Pro Tip: Drying the bracket before applying wax is the single most important prep step. Orthodontic wax is hydrophobic, meaning it repels water. Even a thin film of saliva will cause it to slide right off.
For more on getting used to braces and managing early discomfort, Gloworthodontics has a practical family guide worth bookmarking.
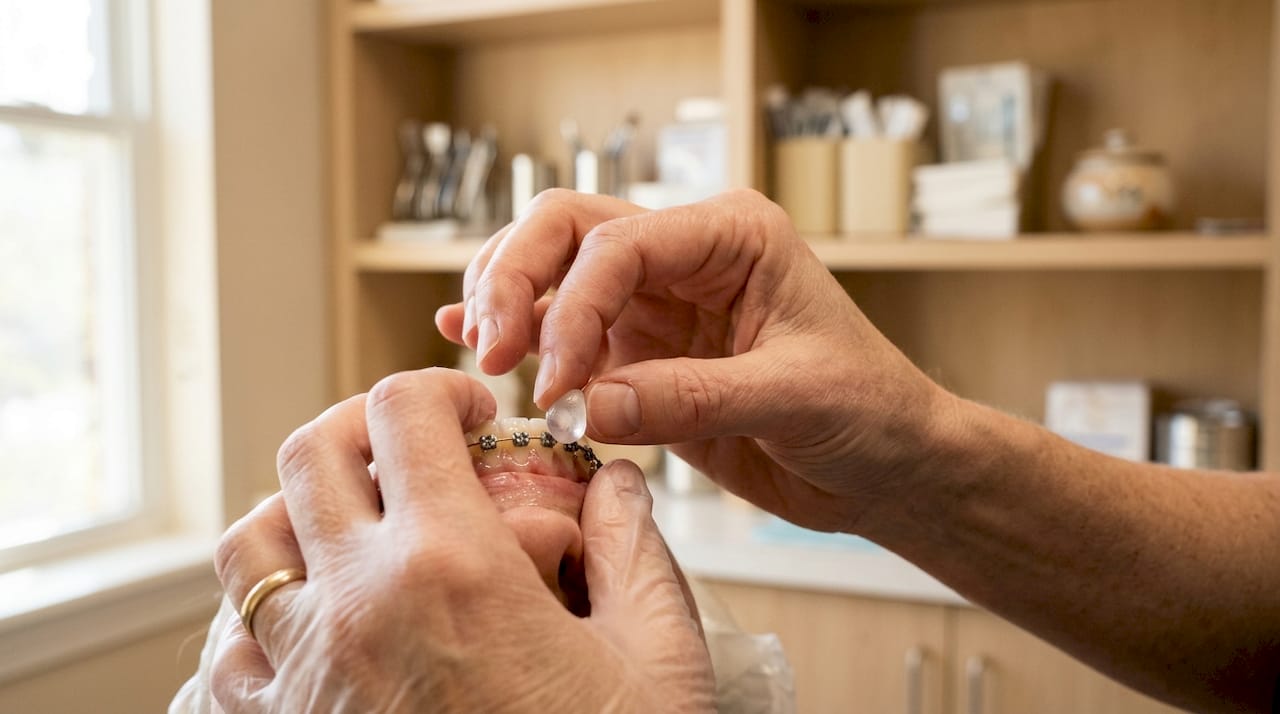
What orthodontic wax is made of
Most dental wax is built from one or more natural waxes. The exact blend varies by brand, but the core ingredients stay consistent.
- Beeswax and carnauba wax come from natural animal and plant sources, respectively
- Paraffin wax is derived from petroleum and is one of the most common bases; most dental waxes contain roughly 40–60% paraffin by weight
- Flavor additives like mint or cherry are sometimes included for comfort, though many formulas stay completely flavorless
- Resins and oils are added to create a smoother surface texture
The wax is solid at room temperature but softens quickly from the warmth of your hands, which is what makes it so easy to mold. That softening is by design, not a flaw. Once pressed onto a bracket, it holds its shape and stays smooth against your cheek tissue.
Safety tips and when wax is not enough
Orthodontic wax is safe. According to the Canadian Association of Orthodontists, accidentally swallowing a small piece is harmless. The formulation is medical-grade and non-toxic, so there is no need to panic if a bit comes off while you are eating or talking.
That said, wax has real limits:
- Remove it before meals when possible, especially if food tends to get trapped underneath
- Change it frequently; old wax collects bacteria and loses its grip
- Never use wax as a substitute for fixing a broken bracket or a wire that has come loose
Pro Tip: To remove wax cleanly, use an interdental brush or floss threader. Work gently around the bracket so you do not accidentally dislodge any part of your braces.
Wax is a bridge, not a repair. If pain continues after a few days, or if a bracket is visibly damaged, contact your orthodontist promptly. Leaving a broken component unaddressed can slow your treatment progress. For soothing irritation between appointments, pairing wax with a gentle rinse can help; this guide on post-orthodontic oral care covers that well.
Wax is also a temporary tool, not a permanent fixture. As your mouth adapts to braces over time, the soft tissues toughen and you will likely need it far less. Most patients find they reach for it less and less after the first month or two.
You can find orthodontic wax at most pharmacies, grocery stores, and online retailers. Your orthodontist may also provide a small supply at your first appointment.
If you have questions about managing discomfort during treatment, the team at Gloworthodontics is ready to help. Explore the orthodontic care guide for teens for more family-focused advice on making braces work for you.

Key Takeaways
Orthodontic wax is a safe, natural barrier that protects your mouth’s soft tissues from braces irritation, and proper application makes it far more effective.
| Point | Details |
|---|---|
| What it is | A non-toxic, medical-grade wax made from beeswax, carnauba wax, or paraffin |
| How it works | Softens from hand warmth, then sticks to brackets and wires to cushion sharp edges |
| Key application step | Dry the bracket first; wax is hydrophobic and will not adhere to a wet surface |
| Replace regularly | Swap out wax every two days or sooner if it gets dirty or loosens |
| Know its limits | Wax relieves discomfort temporarily; broken brackets or persistent pain need professional care |