How to Clean Braces: A Step-by-Step Guide for Families
October 12, 2025
How to Clean Braces: A Step-by-Step Guide for Families
Cleaning braces seems as straightforward as brushing and flossing each day. Yet over 60 percent of orthodontic patients still experience plaque buildup because standard tools barely reach the tight spaces around brackets and wires. The surprising part is that with the right cleaning supplies and a few simple steps, you can keep your braces spotless without the constant worry of hidden debris or tooth decay.
Table of Contents
- Step 1: Gather Your Cleaning Supplies
- Step 2: Brush Your Teeth Thoroughly
- Step 3: Clean the Braces with a Soft Brush
- Step 4: Rinse with Fluoride Mouthwash
- Step 5: Inspect for Remaining Food Debris
Quick Summary
| Key Point | Explanation |
|---|---|
| 1. Prepare an orthodontic cleaning kit | Gather a soft-bristled toothbrush, fluoride toothpaste, floss threaders, interdental brushes, orthodontic wax, and fluoride mouth rinse. |
| 2. Brush at a 45-degree angle | Position your toothbrush at a 45-degree angle to clean effectively around brackets while avoiding damage. |
| 3. Use interdental brushes for precision | Interdental brushes allow you to reach tight spaces between brackets and wires, ensuring thorough cleaning. |
| 4. Rinse with fluoride mouthwash | Use an alcohol-free fluoride mouthwash to strengthen enamel and reduce the risk of decay throughout treatment. |
| 5. Inspect for food debris consistently | Perform a regular visual inspection with bright light to ensure all food particles are removed from braces. |
Step 1: Gather Your Cleaning Supplies
Cleaning braces requires more than just your standard toothbrush and toothpaste. Preparing the right tools will make your orthodontic care routine smooth and effective. Before starting your cleaning process, you need a comprehensive set of specialized tools designed to navigate the complex landscape of brackets, wires, and tight spaces.
Essential Orthodontic Cleaning Tools
Begin by assembling a dedicated cleaning kit that will become your orthodontic maintenance arsenal. The American Dental Association recommends gathering several specific items to ensure thorough cleaning:
- Soft-bristled toothbrush with a small head for precise cleaning
- Orthodontic-specific fluoride toothpaste
- Floss threaders for navigating around wires
- Interdental brushes for cleaning between brackets
- Orthodontic wax for managing wire irritation
- Mouth rinse with fluoride for additional protection
Your soft-bristled toothbrush is particularly crucial. Unlike standard toothbrushes, an orthodontic brush features a unique design with bristles cut at different lengths to effectively clean around brackets and wires. The smaller head allows you to maneuver more precisely, reaching areas that traditional brushes might miss.
Fluoride toothpaste plays a critical role in protecting your teeth during orthodontic treatment. Look for brands specifically formulated for braces, which often contain additional protective ingredients that help prevent decalcification and tooth decay. These specialized toothpastes are designed to reach challenging areas and provide comprehensive cleaning.
Floss threaders and interdental brushes transform your cleaning routine by solving the complex challenge of cleaning between brackets and wires. These tools allow you to remove plaque and food particles that standard brushing might overlook. Floss threaders help guide traditional dental floss underneath orthodontic wires, while interdental brushes can clean tight spaces with remarkable precision.
A complete cleaning kit also includes orthodontic wax, which serves a dual purpose. Not only can it provide comfort by covering sharp wire edges that might irritate your cheeks or gums, but it also helps maintain oral hygiene by preventing potential sore spots that could interrupt your cleaning routine.
By carefully selecting and assembling these specialized tools, you create a personalized cleaning system that will help maintain your oral health throughout your orthodontic journey.
Below is a table that summarizes the essential cleaning tools for braces, including their purpose and tips for effective use.
| Tool | Purpose | Tips for Use |
|---|---|---|
| Soft-bristled toothbrush | Removes plaque from teeth and braces | Choose a small head for better precision |
| Fluoride toothpaste | Protects enamel, prevents decay | Look for brands formulated for braces |
| Floss threaders | Guides dental floss under wires | Use gently to avoid damaging wires |
| Interdental brushes | Cleans between brackets and wires | Select proper size for tight spaces |
| Orthodontic wax | Covers sharp edges, soothes irritation | Apply to any spots causing discomfort |
| Fluoride mouth rinse | Adds protection against decay and strengthens enamel | Swish after brushing for full coverage |
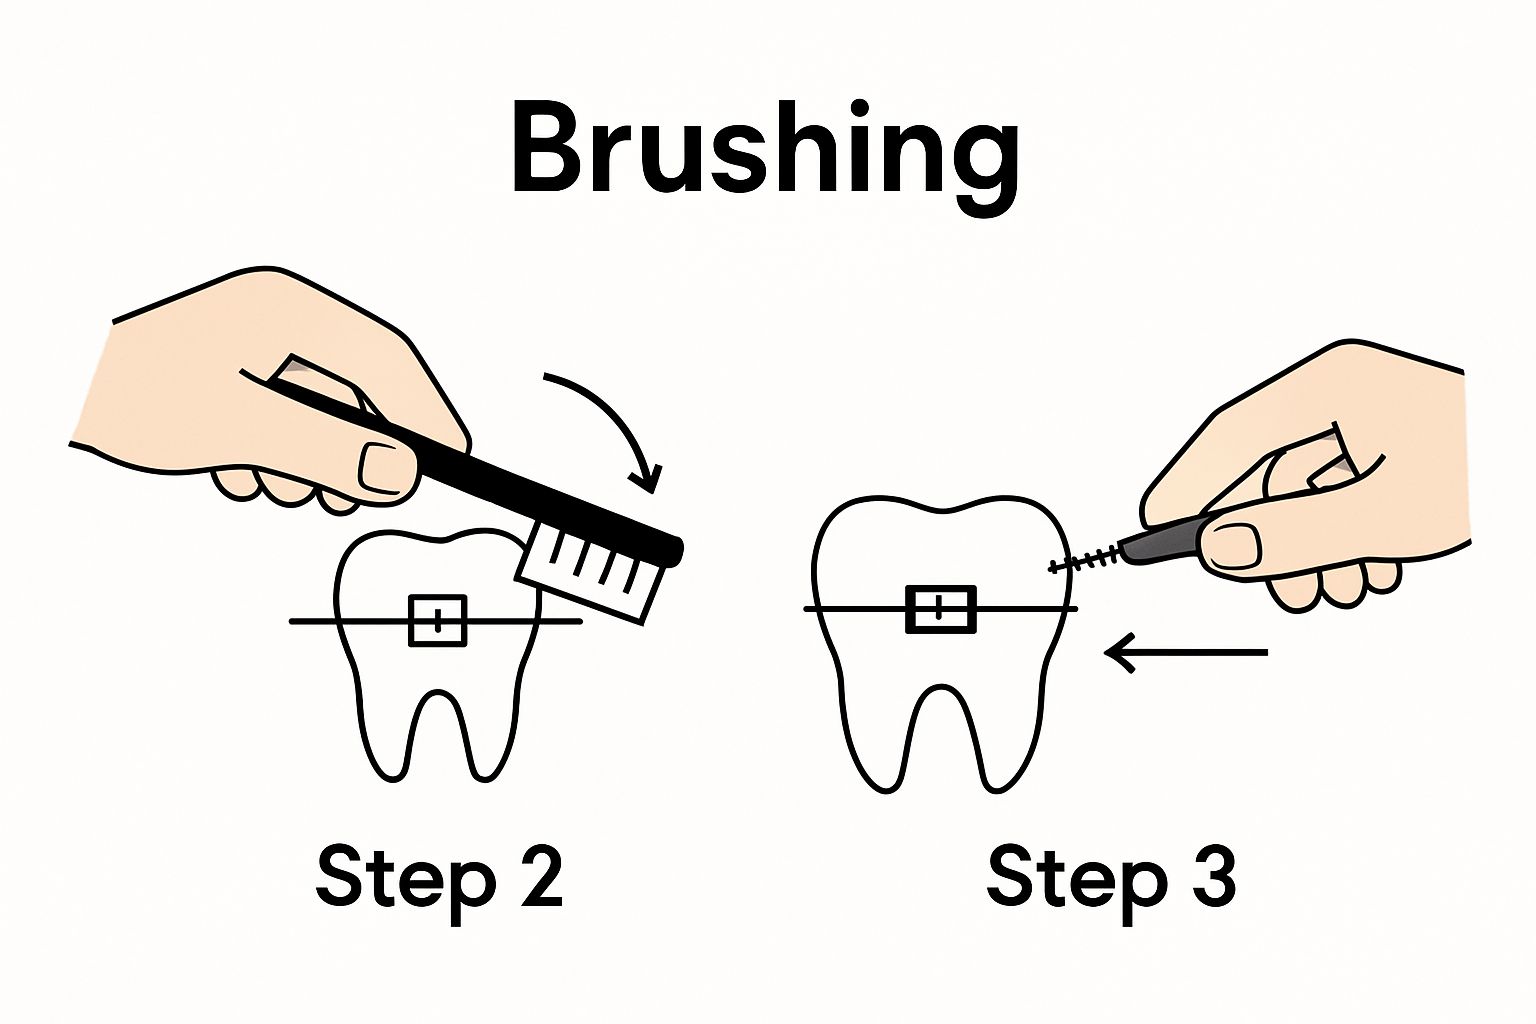
Step 2: Brush Your Teeth Thoroughly
Brushing with braces requires a strategic approach that goes beyond your standard oral hygiene routine. Unlike traditional tooth brushing, orthodontic care demands precision, patience, and a systematic technique to ensure every surface and intricate bracket receives thorough cleaning. The American Dental Association emphasizes the critical nature of post-meal brushing to prevent plaque accumulation and potential dental complications.
Begin by positioning your soft-bristled toothbrush at a 45-degree angle to your gumline. This specific angle allows the bristles to clean both the tooth surface and the area where the bracket meets your tooth—a notorious spot for food particle and plaque buildup. Start with the outer surfaces of your teeth, using gentle, circular motions that carefully navigate around each bracket without applying excessive pressure.
Move systematically through your mouth, spending approximately 10-15 seconds on each tooth section. Divide your mouth into quadrants: upper right, upper left, lower right, and lower left. By treating each section methodically, you ensure no area goes uncleaned. Pay extra attention to the spaces between brackets and wires, where food tends to hide and bacteria can quickly multiply.
When brushing around brackets, use a combination of techniques. Angle your brush to clean the bracket’s top, bottom, and sides, ensuring you remove any trapped debris. Gentle, precise movements are key—aggressive brushing can damage brackets or bend wires, potentially extending your treatment time. Think of it as a delicate dance between thorough cleaning and careful maintenance.
For the inner tooth surfaces, tilt your brush vertically and make several up-and-down strokes. This technique helps clean areas that are typically harder to reach, especially with braces. Remember to brush your tongue gently to remove bacteria and maintain overall oral freshness.
Time is a crucial factor in effective brushing. Orthodontic experts recommend brushing for a full two minutes, which might feel longer than your previous routine. Use a timer or play a short song to ensure you’re dedicating adequate time to your oral care. Many electric toothbrushes now include built-in timers that can help you maintain the proper brushing duration.
After brushing, rinse thoroughly with water to remove any remaining toothpaste and dislodged food particles. Inspect your braces in a well-lit mirror to confirm you’ve cleaned all surfaces. Look for any remaining debris around brackets or between wires. If you spot missed areas, go back and clean them carefully.
By mastering this detailed brushing technique, you protect your teeth during orthodontic treatment and set the foundation for a healthy, beautiful smile. Consistency and patience will transform this process from a challenging task to a natural part of your daily routine.
The following table provides an overview of the main steps for cleaning braces, with estimated time and key outcomes for each phase.
| Step | Estimated Time | Key Outcome |
|---|---|---|
| Gather cleaning supplies | 2-3 minutes | All essential tools are ready |
| Brush teeth thoroughly | 2 minutes | Removes surface plaque and food debris |
| Clean braces with a soft brush | 2-3 minutes | Cleans tight spaces around brackets/wires |
| Rinse with fluoride mouthwash | 1 minute | Strengthens enamel, offers extra protection |
| Inspect for remaining food debris | 1-2 minutes | Ensures complete debris removal |
Step 3: Clean the Braces with a Soft Brush
After your initial brushing, the next critical phase involves using a specialized soft brush to meticulously clean around your braces. This step transforms your oral hygiene routine from basic cleaning to precision maintenance. The American Dental Association highlights the importance of using interdental brushes to navigate the complex spaces between wires and brackets that standard toothbrushes cannot effectively reach.
Positioning is everything when using an interdental brush. Hold the small, cone-shaped brush at a 45-degree angle to your brackets, allowing its tiny bristles to slide gently between the wire and your tooth surface. Think of this process as strategic navigation—you are creating a pathway for cleaning in tight, previously inaccessible spaces.
Begin by selecting an interdental brush with a size that comfortably fits between your brackets. Too large, and you risk damaging your braces; too small, and you will not effectively clean the area. Gently insert the brush between each bracket, using a soft, back-and-forth motion. Move slowly and deliberately, ensuring you clean every potential debris-trapping zone without applying excessive pressure.
Focus on the areas where your brackets connect to your teeth. These junction points are prime locations for plaque accumulation and potential dental issues. Rotate the interdental brush slightly as you move, allowing its bristles to reach different angles and dislodge stubborn food particles. Pay special attention to the spaces between brackets, where food tends to hide and bacteria can quickly multiply.
For those with more complex orthodontic setups, consider using multiple brush sizes. Some interdental brush packages come with various diameter options, allowing you to switch between sizes depending on the specific spacing between your brackets. Versatility is key in maintaining a comprehensive cleaning routine.
As you clean, periodically rinse your interdental brush to prevent redepositing removed debris. This simple step ensures that each movement is truly cleaning rather than redistributing food particles. Look for brushes with small handles that provide excellent grip and maneuverability, making the cleaning process more comfortable and precise.
After completing your interdental brush cleaning, take a moment to inspect your work. Use a well-lit mirror to verify that no visible food particles remain around your brackets. If you notice any persistent debris, gently repeat the cleaning process in that specific area. Patience and thoroughness are your best tools in maintaining optimal oral hygiene during orthodontic treatment.
Remember that cleaning braces is a skill that improves with practice. Your initial attempts might feel awkward, but over time, you will develop a natural rhythm and technique that makes this process quick and efficient.
 Consistent, careful cleaning not only maintains your braces but also protects your long-term dental health.
Step 4: Rinse with Fluoride Mouthwash
Rinsing with fluoride mouthwash represents the final defensive barrier in your orthodontic cleaning routine, providing comprehensive protection beyond brushing and interdental cleaning. The National Institute of Dental and Craniofacial Research emphasizes that fluoride mouthwash offers critical additional defense against tooth decay, particularly for patients wearing braces.
Choosing the right mouthwash is crucial. Select an alcohol-free fluoride mouthwash specifically designed for orthodontic patients. These specialized formulations provide extra protection without causing dry mouth or irritating sensitive oral tissues. Look for products that explicitly mention compatibility with braces and enhanced fluoride protection.
Before rinsing, ensure you measure the recommended amount precisely. Most fluoride mouthwashes come with a small cap or measuring cup that indicates the correct dosage. Typically, this is about 20 milliliters or four teaspoons of liquid. Pouring too much can be wasteful, while using too little reduces the protective benefits.
Take the measured mouthwash and swish it thoroughly throughout your mouth, paying special attention to areas around your brackets. Tilt your head slightly to allow the liquid to flow between and behind your braces. Use a gentle but consistent swishing motion, moving the liquid from side to side and front to back. Aim to rinse for 30-45 seconds, which provides enough time for the fluoride to coat your teeth and brackets effectively.
When rinsing, create a rhythmic motion that ensures complete coverage. Imagine dividing your mouth into quadrants and spend approximately 10-15 seconds in each section. This methodical approach guarantees that no area goes untreated. The fluoride will help remineralize tooth enamel, creating an additional protective layer against potential decay.
After completing your rinse, do not eat or drink for at least 30 minutes. This waiting period allows the fluoride to continue its protective work, maximizing its potential to strengthen your tooth enamel. Avoid rinsing with water immediately after using fluoride mouthwash, as this can dilute the protective coating.
For patients with increased sensitivity or those prone to cavities, consider using fluoride mouthwash twice daily—once in the morning and once before bed. This frequency provides continuous protection, especially during orthodontic treatment when maintaining oral hygiene becomes more challenging.
Pay attention to how your mouth feels after rinsing. A slight tingling sensation is normal, but persistent discomfort might indicate you need a different product. Some individuals might experience mild sensitivity, which usually subsides as your mouth adjusts to the routine.
By incorporating fluoride mouthwash into your daily oral care regimen, you add a powerful, final layer of protection. This step not only cleanses but actively works to prevent tooth decay, ensuring your teeth remain healthy throughout your orthodontic journey. Consistency is key—make this rinse a non-negotiable part of your dental care routine.
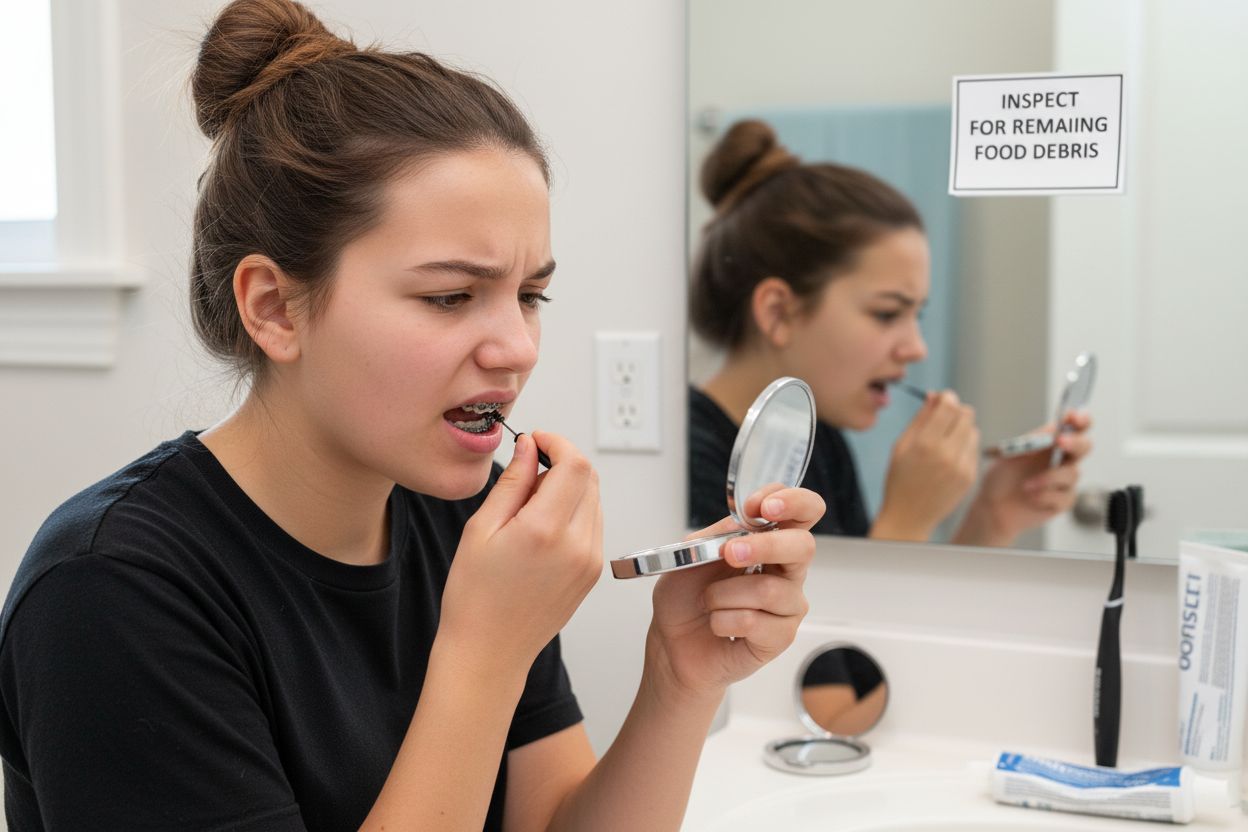
Step 5: Inspect for Remaining Food Debris
The final and often overlooked step in your orthodontic cleaning routine is a meticulous visual inspection to ensure no food particles remain trapped in your braces. The American Association of Orthodontists emphasizes the critical nature of thorough debris removal to prevent potential dental complications and maintain optimal oral health.
Lighting is your most important tool in this inspection process. Position yourself in a well-lit bathroom or area with bright, direct lighting. Natural daylight or bright LED lights provide the best visibility for examining the intricate spaces around your brackets and wires. A handheld mirror can help you view hard-to-see areas, allowing you to rotate and angle your view for comprehensive inspection.
Begin your inspection by systematically examining each tooth and bracket. Start from one side of your mouth and methodically move across, checking the top and bottom rows. Look for any white, yellow, or brown specks that might indicate remaining food particles. Pay special attention to the areas directly around brackets, underneath wires, and between teeth where debris tends to hide.
Use your interdental brush or a clean, soft-bristled toothbrush to gently dislodge any spotted debris. Sometimes, particles can be stubborn and require a second cleaning attempt. Move the brush at different angles, using gentle prodding motions to release any trapped food. Be patient and thorough—this is not a race, but a careful examination of your oral landscape.
If you wear colored elastics or bands, inspect these areas with extra care. These small rubber components can easily trap food particles and become discolored. Gently clean around the attachment points, ensuring no remnants compromise your orthodontic hardware or oral hygiene.
Develop a consistent inspection routine that becomes second nature. Some patients find it helpful to keep a small, compact mirror in their bag or car for quick checks after meals. Carry a travel-sized interdental brush as a backup tool for emergency debris removal when you cannot do a full cleaning.
Technology can be an unexpected ally in your inspection process. Many smartphones now have excellent cameras with zoom capabilities. Take a quick selfie from different angles to help you spot missed debris. While this should not replace careful manual inspection, it can provide an additional perspective.
Look for subtle signs of potential issues beyond just food debris. Check for any slight discoloration around brackets, which might indicate early plaque buildup. Observe whether your brackets appear symmetrical and securely attached. Any unusual observations should be discussed with your orthodontist during your next scheduled appointment.
Remember that this inspection is more than a cosmetic step—it is a critical component of maintaining your oral health during orthodontic treatment. Missed food particles can lead to plaque buildup, potential tooth decay, and even gum inflammation. By making this careful inspection a consistent part of your daily routine, you are protecting your investment in a beautiful, healthy smile.
Confident Braces Care Made Easy With Professional Support
Struggling to keep your family’s braces spotlessly clean can feel overwhelming. You are not alone if you worry about missed food debris around brackets or whether you are using the right cleaning tools for every nook and cranny. Our step-by-step guide covers every detail, but sometimes you need expert guidance and personalized support to overcome these daily challenges and keep your smile healthy.

It is time to make oral hygiene with braces worry-free. At Glow Orthodontics, our dedicated team specializes in personalized orthodontic care, providing cleaning tips and hands-on support for families in Langley and beyond. Book your appointment, ask questions about your home care routine, or discover how our warm and professional environment can help you confidently care for braces at every stage. Visit our homepage now to start your journey toward a cleaner, healthier, and brighter smile. Act today, and experience the comfort and expertise your family deserves.
Frequently Asked Questions
How often should I clean my child’s braces?
Cleaning your child’s braces should happen at least twice a day, preferably after meals. Brush thoroughly for about two minutes each time to ensure all surfaces of the braces and teeth are clean.
What cleaning supplies do I need for braces?
You will need a soft-bristled toothbrush, orthodontic-specific fluoride toothpaste, floss threaders, interdental brushes, orthodontic wax, and fluoride mouthwash. Assemble these items in a designated cleaning kit for easy access during your orthodontic care routine.
How do I properly brush teeth with braces?
Position the toothbrush at a 45-degree angle to the gumline and use gentle, circular motions to clean around brackets and between wires. Spend about 10-15 seconds on each quadrant of your mouth to ensure thorough cleaning.
Can I use mouthwash after brushing my braces?
Yes, you can use fluoride mouthwash after brushing your braces to provide an additional layer of protection against tooth decay. Rinse thoroughly for 30-45 seconds to allow the fluoride to coat teeth effectively.
What should I do if I see food debris stuck in my braces?
Inspect your braces in a well-lit mirror and use an interdental brush or a soft-bristled toothbrush to gently dislodge any visible food particles. Be patient and thorough while cleaning to prevent plaque buildup.
How can I make cleaning braces easier for my child?
Creating a consistent cleaning routine can help make the process easier. Encourage your child to set a timer for two minutes when brushing and incorporate visuals, like a chart, to track their progress and compliance.